Monday, May 9, 2022

Looking back


In the beginning of this semester, the learning objectives that I listed out are


▫️ To apply some new media and technologies into practice

▫️ To understand the technology used in art education from a critical perspective

▫️ To understand the affordances and constraints of different media

▫️ To research on an artist who has been placed in the intersection of new media art, learning and technology

▫️ To understand artistic practices powered by VR/AR technologies

I can tick out most of these objectives one by one.

First, I have many opportunities to engage in individual projects or group projects, where I can try different media out and apply them into practices. For example, prior to this course, I have never used circuit. In this course, I learned how to build a circuit and use it to create an artwork.

Second, I have read many recommended articles assigned by the instructor. Through these readings, I gained a comprehensive view of the application of media and technologies in art education at school settings. I also contribute my own views of the related topics in the key takeaways as assignments. I have a better understanding of the affordances and constraints of technologies and tools.

The third objective is similar to the second objective. A critical view of technologies means knowing the affordances and constraints of them.

Forth, I appreciate the chance to lead the digital steward in this semester. It is a great research experience for me in this course, through which I can dive deeper into an interesting topic. Research on artists specializing in 3D printing is interesting since I browsed so many 3D printing artworks and understood the unique thoughts expressed by different artists using 3D printing.

Fifth, in my final project, I explored VR/AR technologies in artistic practices. I do think they are good methods to optimize the user experience in museum visiting or other tours. For example, if we can create a AR Columbia Tour, where visitors can use phone to scan around the campus and learn about the history of the university, visitors can still have good visiting experiences without a guide.

Lesson Plan


3D Fabrication Lesson Plan


Lesson Plan 1 

Learner 

Middle school students 

Learning Objectives

  • Learn about mathematical frameworks for modeling objects in two dimensions and in three dimensions

  • Learn how to model objects using CAD

  • Learn about design for manufacturing

Curriculum 

Unit 1

The introduction of mathematical basics (two dimension, three-dimension) and  3D printing foundations (principles, process, technologies)

  • Material: slides, videos 

  • Practice: Quiz (some questions to test students’ knowledge of dimension and 3D printing)

Unit 2

Observe 3D Print work and the process of 3D printing

Learn to use the tools

  • Material: 3D printing tools

  • Practice: Draw out the whole process of printing a 3D object 

Unit 3

Group work - Create Emoji using 3D printing

Students will follow design process, from brainstorming and taking measurements, to modeling, 3D printing and analyzing their product

  • Materials: Paper, pensil, 3D printing tools 

  • Practice: Group Project work

Lesson Plan 2

Learner 

High school students 

Learning Objectives

  • Learn about the learning environment and the elements

  • Learn about the concepts of 3D modeling and printing

  • Learn about how to use tools for 3D modeling and printing

Curriculum 

Unit 1

Observe the learning environment

By gathering students' opinions through a class questionnaire, positive and negative aspects of the current classroom layout are identified.

  • Material: Paper, pensil, slides, computer 

  • Activity: discussion

Unit 2

Introduction of 3D modeling and printing, and the related tools using videos and lecture

  • Material: slides, videos 

  • Practice: Quiz 

Unit 3

A group project which consists of 6 steps:

Step 1 - Group idea  Step 4 - modeling

Step 2- Brainstorm  Step 5 - Printing

Step3 - Draft  Step 6 - Assemble

  • Material: Paper, pen, 3D printing tools, computer

  • Activity: group project 

Unit 4

Showcase. They can present their ideas with other people and  get feedback from other students and teachers. 


Wednesday, May 4, 2022

Final: Voice + Sculpture + Digital Drawing


My final project is Lion Roar, which is an AR digital project that I made using Unity. In this project, I combines the three keywords I got: voice, sculpture, and digital drawing. How do I combine them? Here it is. When the user opened the AR app and used the camera to scan a digital drawing of a lion, a lion sculpture will show up in the scene. In the interface, there is a button saying lion Roar. When the user clicks the button, then the voice of the lion can be heard. 


When I got these three keywords, I felt a little bit panicked because I got no idea how to combine these seemingly-irrelated three things. At the ideation stage, I chose to broaden my view by talking to friends, hearing their thoughts, and considering it with other courses' content. Finally, I got an idea to complete this project using AR technology. I thought it would be interesting to connect what I learned about AR technology this semester to this course. AR technology is one of the cutting-edge media for people to express and create. 

Therefore I made a plan to complete this project: 

1. Test the AR image recognition feature 

2. Learn how to add sound and buttons to the project

3. Prepare a digital drawing

4. Search for a 3D model sculpture 

5. Create an AR image recognition app 


For the first two steps, I referred to the learning materials and made sure the project worked, even though it took a long time to debug. To add a button to allow users to interact with it, I search for solutions on the internet and learned how to do it by following a youtube video. That was helpful. After these two steps, I drew a lion using Adobe illustrator. Since I used AI a lot, I did not come across challenges. For the 3D model, I luckily found one on Unity Assets for free. After preparing all these stuff, the following step is to create an AR app using Unity. Everything went well during this process. 


Wednesday, April 27, 2022

Assignment 04/27: Circuit


Here is the outcome of my circuit project. I made a street light using the toolkit that I got from the studio. This is my first time making a circuit project and it was a very fun try-out. I appreciate Qing's instructions on how to establish a circuit step by step. I observed her while she made hers, and then I followed her to make my project. It is a great learning experience with peers. 

I took the first step to mapping out the circuit by drawing on paper. Then, I put the metal sticky paper along the line and connect it to the bulb and the battery. For the best effect, I tried a lot to adjust the location of the battery. 

Two takeaways

“Schools can have access to everything in terms of money and technology, but they must have teachers who show how to use them correctly,”

I do agree that the quality of teaching is the key to a good learning effect. Teachers play an important role in integrating technologies in the classes. Technologies themselves can not fulfill certain learning objectives. Only after the careful course design, the adoption of technologies can best support the objectives and achieve better outcomes, 

“The greatest impact probably came as an assessment and communication tool–students were able to document and assess their growth as an artist as well as communicate with others about art. It leveled the playing field for students because each student had a voice and the time and safe place they needed to use that voice.”

It is true that the electronics have affordances for communication and assessment tools. The horizon of students is expanded a lot with electronics and people are connected together. That is why connectivism came out. Connectivists stressed the importance of establishing connections with the outside world. In this way, students can reach out to abundant resources. With the help of electronics, students do not need the super brain to memorize knowledge but need to know how to access the knowledge. 


Wednesday, April 20, 2022

Assignment 04/20: 3D fabrication


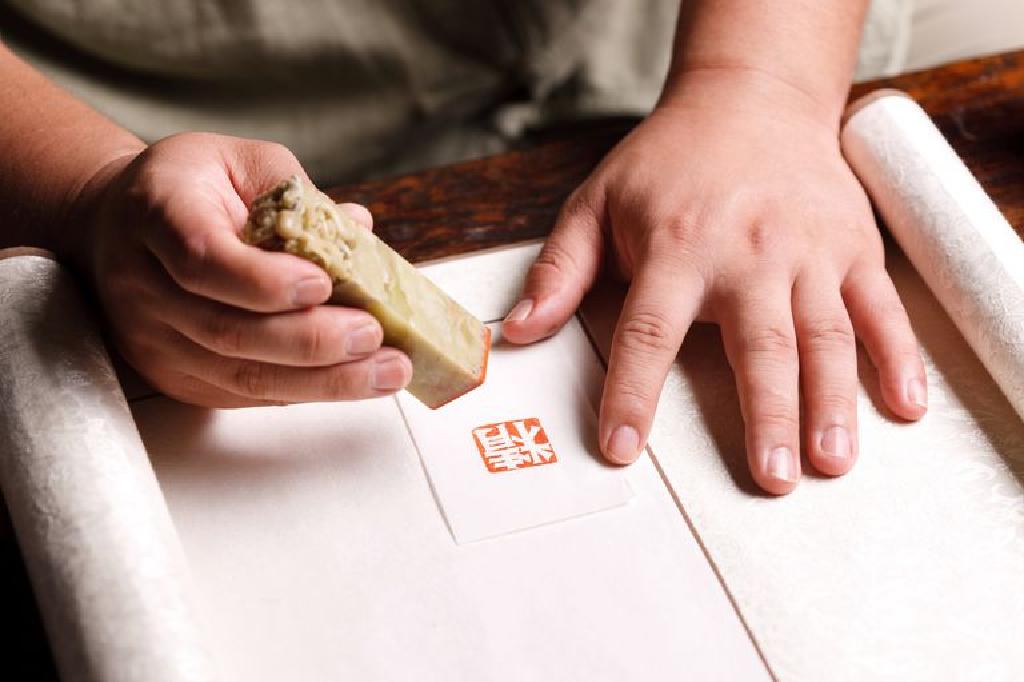
I teamed up with Qing again for this project. We made a seal, which is a device for making an impression in wax, clay, paper, or some other medium, including an embossment on paper, and is also the impression thus made.


In most traditional forms of dry seal the design on the seal matrix is in intaglio (cut below the flat surface) and therefore the design on the impressions made is in relief (raised above the surface). The design on the impression will reverse (be a mirror-image of) that of the matrix, which is especially important when script is included in the design, as it very often is. This will not be the case if paper is embossed from behind, where the matrix and impression read the same way, and both matrix and impression are in relief. However engraved gems were often carved in relief, called cameo in this context, giving a "counter-relief" or intaglio impression when used as seals. The process is essentially that of a mould.


We divided the work first. Qing took the responsibility for doing the design and I took the responsibility for 3D printing. She used Tinkercad to finish the design. Tinkercad is definitely a user-friendly web software for us to do 3D design. Then, I went to the studio and printed it out. I appreciated the help from the studio staff. With their assistance, I figure out how to use support for the overhanging parts of our project. After following the instructions, we finally printed our project out. It looks good! 


Wednesday, April 13, 2022

Assignment 04/13: 3D design


I created a toy bear using Tinkercad. I made this bear following a youtube video. Even though the video is just 3 minutes or so, it took me some time to pause and do it myself. I found the tricky part was the adjustment of the three dimensions. 

I think Tinkercad is a beginner-friendly web app that allows beginners to master the tool very quickly. The user interface is easy to navigate. There are some basic shapes that users can use. I also found that it allows users to import 2D/3D files, but I never tried it. Overall, I enjoy using Tinkercad to do 3D design due to its simplicity. 


Thought of Final Project

The three keywords I got are sculpture, digital drawing, and voice. I am thinking about using digital drawing to make a 3D model to represent the voice and then make a sculpture.

Take-away from the reading 

"The  real  power  of  any  technology  is  not  in  the  technique  itself or in the allure it generates, but in the new ways of personal expression it enables, the new forms of  human interaction it facilitates, and the powerful ideas it makes accessible to children. "

I agree with this point of view.  When we attempt to integrate technologies into education, we cannot put the learners aside and we should always bear learning goals in our minds. Otherwise, technologies won't be an effective way to boost the learning effect. I also oppose that we pay more attention to the interactions between technologies and human beings rather than interactions among people. 


Looking back

In the beginning of this semester, the learning objectives that I listed out are ▫️ To apply some new media and technologies into practice ...